Production of urban landmark models
Production Plan for Landmark High Rise Building Display Model
1、 Design Analysis and Overall Concept
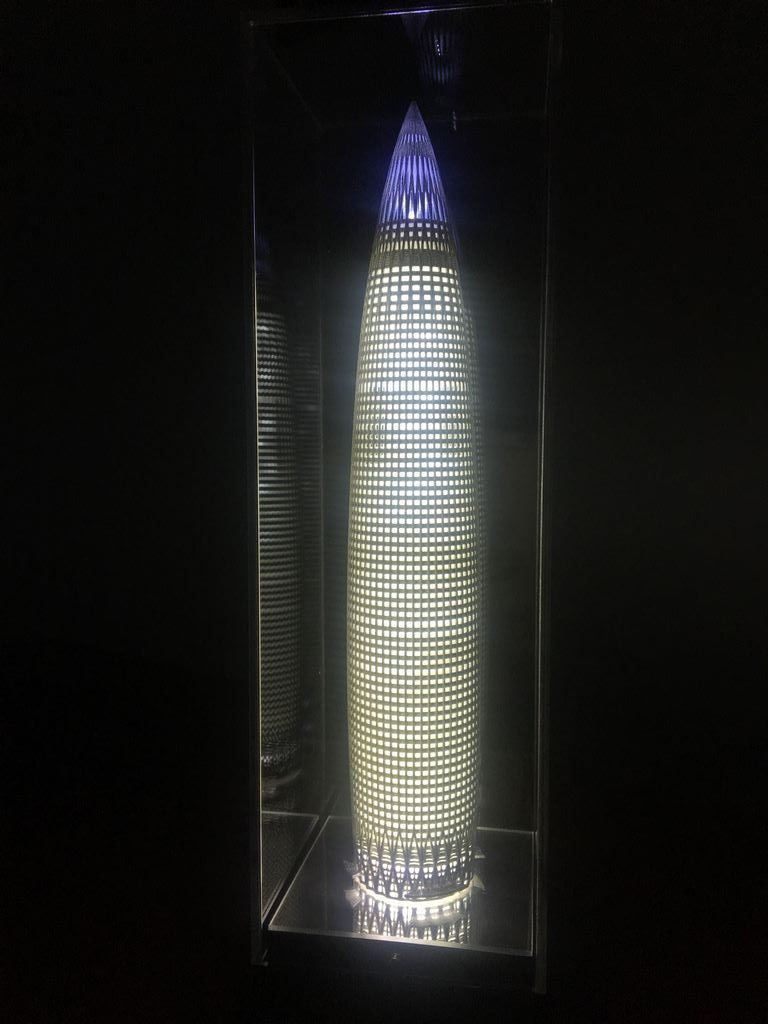
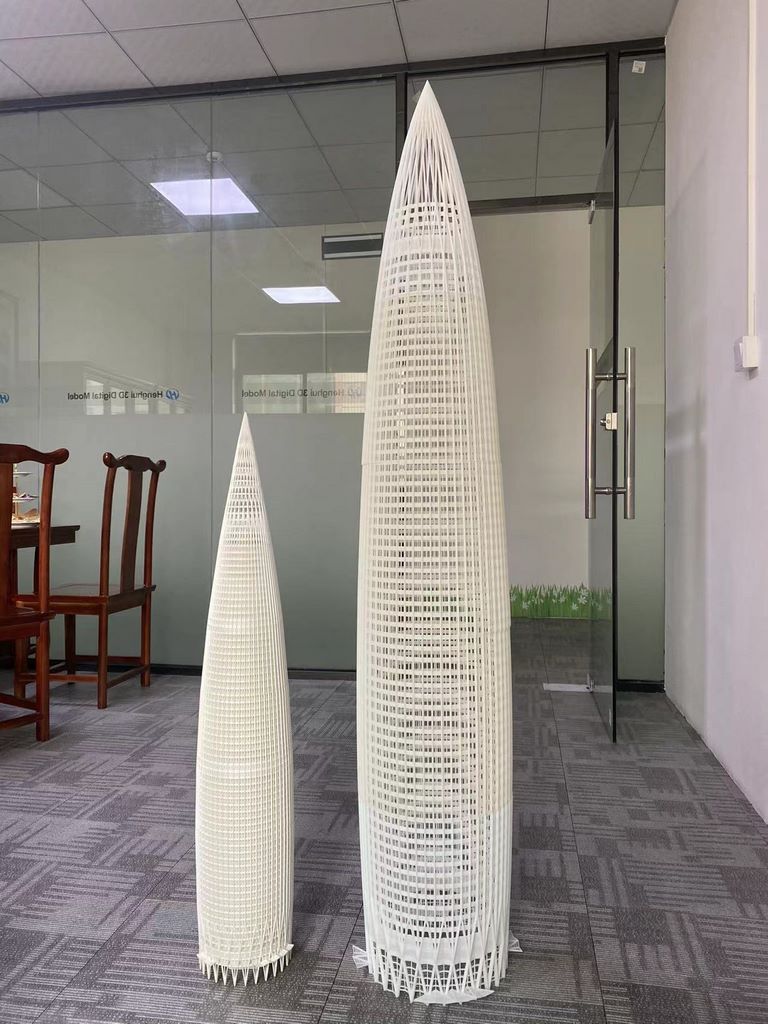
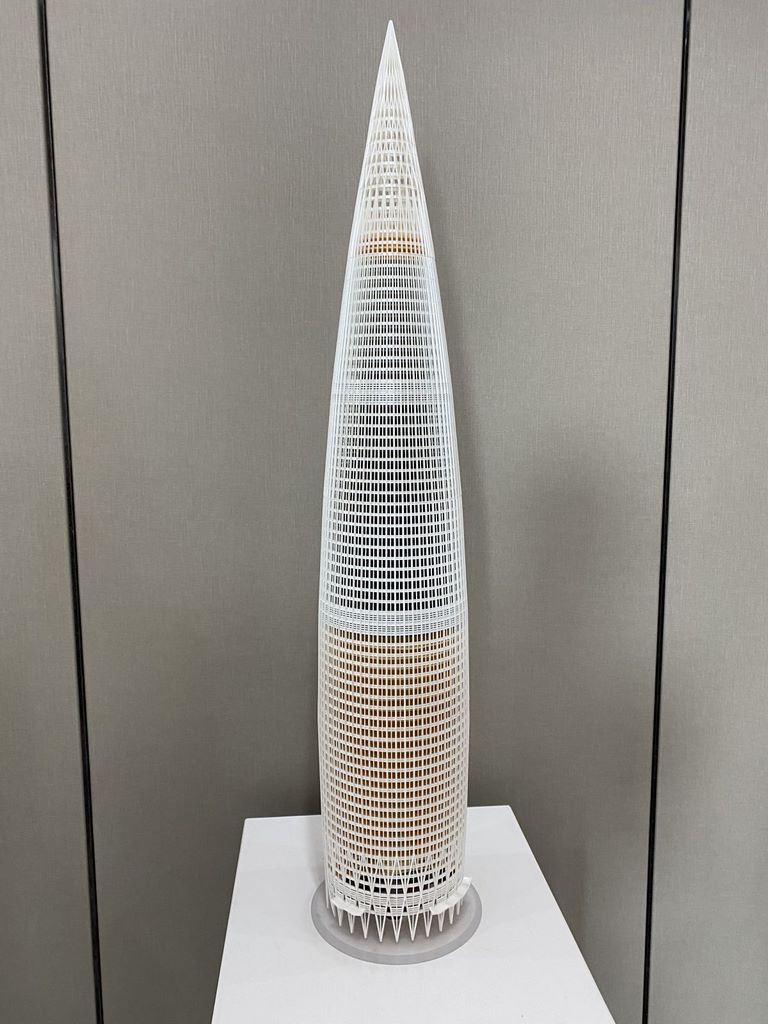
This plan aims to accurately reproduce the iconic high-rise building model shown in the picture. The core features of this building are its towering and slender proportions, a grid like white exterior structure, and dark material areas dotted in the middle and bottom. The key to production lies in perfectly reproducing the sculptural, transparent, and technical beauty of a “structural artwork”, pursuing a degree of restoration of over 90%.
2、 Material selection and matching art
The texture of the model is closely related to the final effect and material selection.
Main structural material: The main supporting structure inside the building and the external grid skeleton are recommended to use ABS plastic square bars or high-quality oak strips. These two materials have good straightness, are easy to cut and bond, and can form a straight skeleton.
Skin and filling material: The external grid like skin can be made of laser engraved white ABS grid board or high-density cardboard, and unique patterns can be replicated through precise cutting.
Dark colored material: The dark colored area in the middle and lower parts can be made directly from deep brown or dark gray ABS board, or achieved through fine coloring on a white substrate in the later stage.
Adhesive: It is recommended to use model specific adhesive (such as Loctite 414) for bonding plastic parts, while white latex is used for splicing paper or wooden components.
Coating and protective materials: Prepare water-based white matte paint as the main color, dark brown model paint for details, and finally use matte protective paint to unify and protect the paint surface.
3、 Core production process flow
Internal skeleton construction – ensuring a straight posture
This is the solid foundation of the model. Firstly, determine the size and strength of the central main load-bearing column based on the height and proportion of the building. Then, like building a real steel structure, horizontal “floor slab” ring beams are laid layer by layer and firmly connected to the central column and peripheral vertical columns. The entire process must be continuously checked with a square ruler to ensure that each floor is absolutely horizontal and perpendicular to the central axis, so as to ultimately form a straight upward, stable and elegant posture of the building.
Shaping Grid Skin – Creating Transparent Rhythms
This is the essence of the model. After finely bending and shaping the prefabricated grid panels according to the curvature and angle of the building facade, carefully wrap and adhere them to the already constructed internal skeleton. Special attention should be paid to the alignment of grid seams during bonding to ensure the continuity and integrity of the pattern. For complex curved areas, it may be necessary to divide the large mesh into small pieces, fit and paste them one by one, in order to accurately reproduce the unique texture and lighting effects of the building’s exterior.
Integration and detailed depiction of dark areas
The dark areas in the middle and lower parts can be pre fabricated as independent blocks and then integrated with the main grid structure for installation. Be sure to ensure smooth and natural transitions at the interface. In addition, subtle details such as entrances and viewing platforms need to be carved and made using thinner materials separately, and then accurately embedded into the main body to add rich levels of detail to the model.
4、 Post processing and texture enhancement
Surface finishing and primer treatment
After all components are assembled, it is necessary to carefully fill all small joints and defects with model soil. After it is completely dry, use sandpaper of different grit sizes (from coarse to fine) to polish it finely multiple times until the surface of the model reaches a smooth and perfect state. Subsequently, apply a layer of grey water-based grid primer as a whole. This layer of primer not only unifies the base color, but also exposes any subtle surface defects, making it easy to make final corrections and laying a solid foundation for subsequent coloring.
Layered spraying and texture shaping
Main color spraying: Use water-based white matte paint and use a “multiple thin spraying” method to evenly cover the entire model. Matte texture can effectively avoid unrealistic plastic reflections and present a high-end texture.
Coloring of dark areas: Accurately cover and color the dark areas in the middle and lower parts, or use a fine pen to carefully apply by hand. Attention should be paid to subtle texture changes in dark materials such as dark metal or stone.
Light and shadow enhancement: In the concave areas of the grid or the shaded areas where structures intersect, a very thin gray stain solution can be used for gentle cleaning operations to deepen the shadows and further enhance the three-dimensional sense of the model and the depth of the grid.
Overall effect adjustment and final protection
After all paint surfaces are completely dry, carefully inspect the overall effect. Fine tune uneven or protruding areas. Finally, evenly spray matte protective paint on the entire surface. This can not only effectively protect the diligently completed paint surface from scratches and fingerprints, but also unify the glossiness, making the model present a calm, realistic, and realistic final visual effect comparable to the real scene.