Camera display model production
Professional camera display model production plan
1、 Design Analysis and Overall Concept
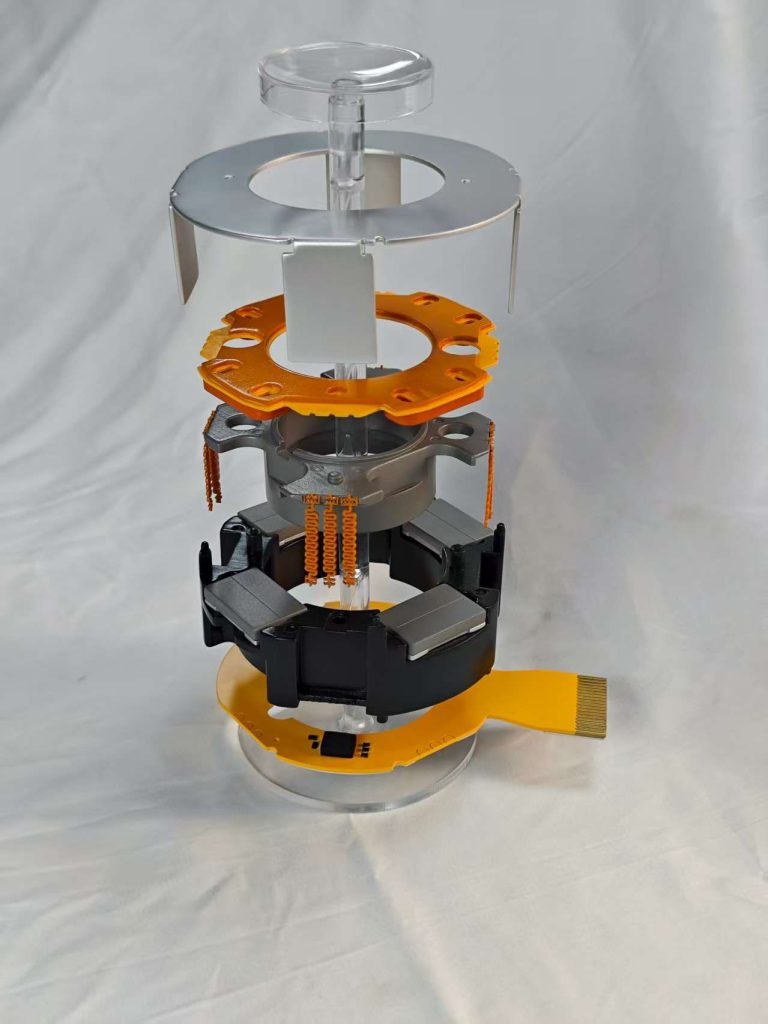
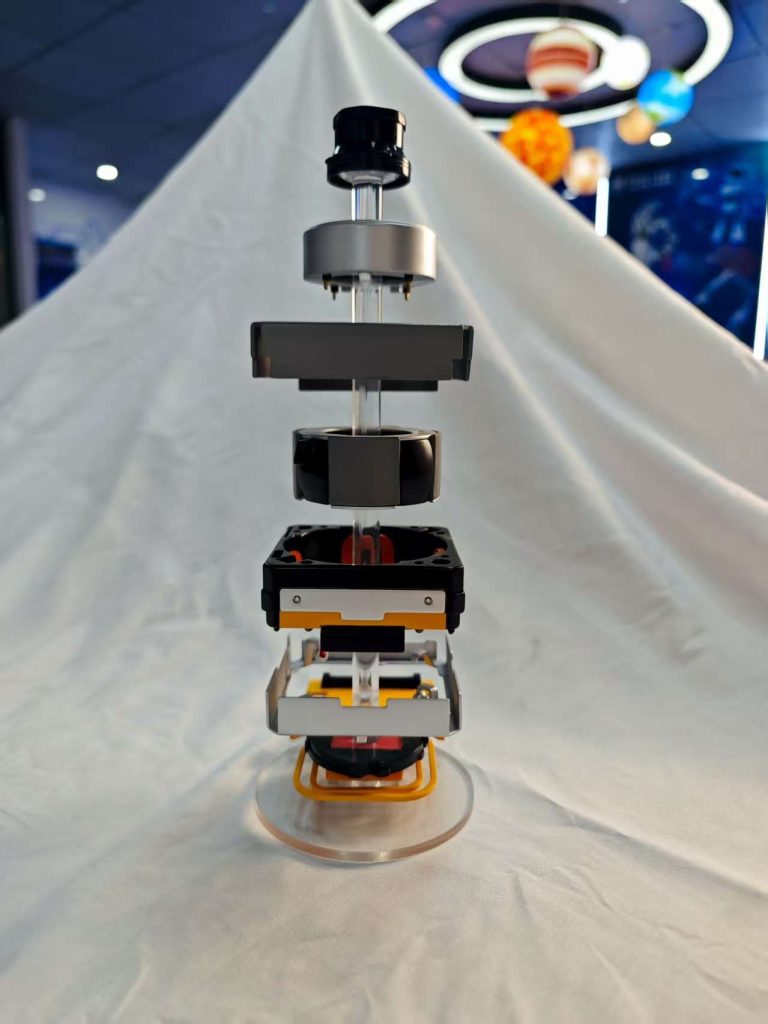
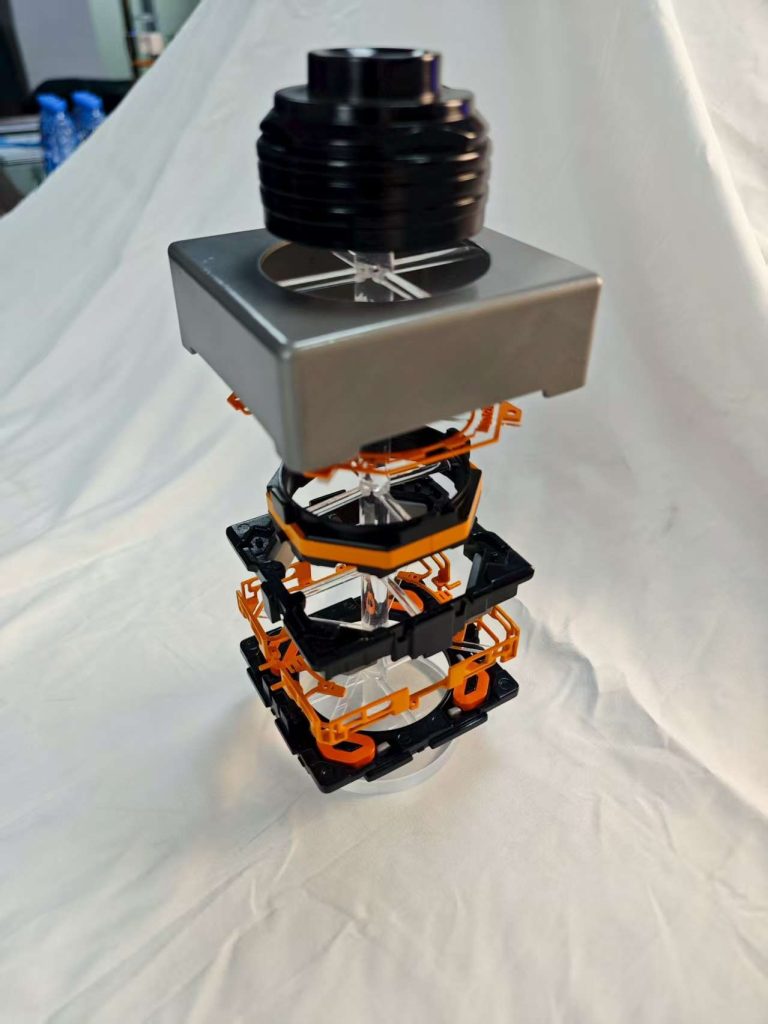
This plan aims to accurately reproduce the professional camera model shown in the image. The core features of this model are its strong sense of professional equipment, multi-level structural combination, black and orange color scheme, and the transparent texture of large lenses. The production needs to focus on the complex three-dimensional composition of the body, the precise docking relationship between various components, and the visual impact brought by the two colors, ultimately achieving a visual fidelity of over 90%.
2、 Material selection and matching art
The texture of the model highly depends on the precise selection of materials.
Main structural material: It is recommended to use high-density ABS board or high-quality oak plywood for the main body of the fuselage (black part). These two materials are easy to cut and shape, capable of handling complex polyhedral structures of the body, and are sturdy and not easily deformed after molding.
Lens material: The top large lens is the visual focal point. The outer ring of the lens is made of ABS board, while the lens itself must be finely polished with transparent acrylic board or resin glass to simulate the transparency of optical glass.
Orange component material: The orange decorative strip/functional block on the side can be directly cut from orange ABS board or finely colored on white ABS board.
Adhesive: Model specific adhesive (such as Taguchi seam adhesive) is used for seamless splicing between ABS components; Quick drying adhesive can be used for temporary fixation of small components.
Coating materials: water-based matte black primer, premium matte black topcoat, vibrant orange model paint, and final matte protective paint are the key to ensuring the final texture.
3、 Core production process flow
Body Structure Shaping – Building Complex Blocks
Adopting the strategy of “piece production, overall combination”. Decompose the camera model into several large blocks, including the top lens compartment, middle body, bottom base, and orange components on the sides. Each large block is then constructed into its basic form by cutting and bonding ABS boards according to its geometric shape, like building blocks. For example, the cylindrical lens capsule can be formed by bending thin ABS plates, while the angular body can be precisely spliced by flat plates. This process requires continuous comparison of the design drawings to ensure that the angles and dimensions of each face are accurate and correct.
Lens Assembly – Creating Visual Focus
Lens ring: a circular lens frame made by car or spliced together, and polished smooth.
Lens: Cut the transparent acrylic board into circles, then use sandpaper (dipped in water) from coarse to fine for polishing, and finally use model polishing paste for polishing treatment to achieve a highly transparent and shiny effect.
Integration: Insert the polished “lens” into the lens ring, fix it from the inside to form a complete lens unit, and then install it on the top of the body.
Detail deepening and component integration
The fine details such as the heat dissipation grille, screw holes, and brand logo on the surface of the body need to be finely carved using a push knife or hook knife. After the orange component on the side is separately made, it is precisely bonded to the black body to ensure tight seams and sharp transitions. After all components are assembled, a comprehensive inspection is required to correct any unevenness.
4、 Post processing and texture enhancement
Surface finishing and primer treatment
This is the foundation for obtaining professional quality. Use the model to fill in all joint lines and surface defects carefully. After it is completely dry, use sandpaper of different grit sizes (from 600 to 1500 grit) for multiple “water grinds” until the surface of the model reaches a baby skin like smoothness. Then, spray the gray water-based grid primer as a whole. This layer of primer can greatly assist in the subsequent inspection of minor surface defects and provide an excellent foundation for paint adhesion.
Color separation spraying and texture shaping
Main color spraying: The overall model is first sprayed with a high-grade matte black topcoat. The principle of “small amount multiple times” thin spraying must be adopted, with multiple layers of thin coating until the color reaches a deep and uniform coverage. Matte black can perfectly reproduce the calm texture of professional equipment.
Coloring the orange area: Use masking tape to accurately cover the black area, exposing the orange components, and then spray bright orange paint. Multiple layers of thin spraying are also required to ensure color saturation and brightness.
Staining and Detail Emphasis: Gently apply diluted dark gray or black stain solution to the entire model, allowing it to naturally flow into all depressions such as the inside of the lens ring, panel seams, and carved lines. When partially dry, use a soft cloth or cotton swab dipped in a small amount of solvent to gently wipe off excess stains on the flat surface, thus preserving and deepening the shadow lines, greatly enhancing the three-dimensional and mechanical sense of the model.
Final protection and presentation
After all paint surfaces are completely dry, perform the final inspection. Finally, spray 1-2 layers of matte protective paint evenly on the entire surface. This step is crucial as it can effectively protect the delicate paint surface from fingerprints and scratches, and unify the overall gloss, completely eliminating the plastic or paint feel, making the model present a high-end and professional final visual effect like a real product. It can be equipped with a simple black booth to enhance its sense of technology.