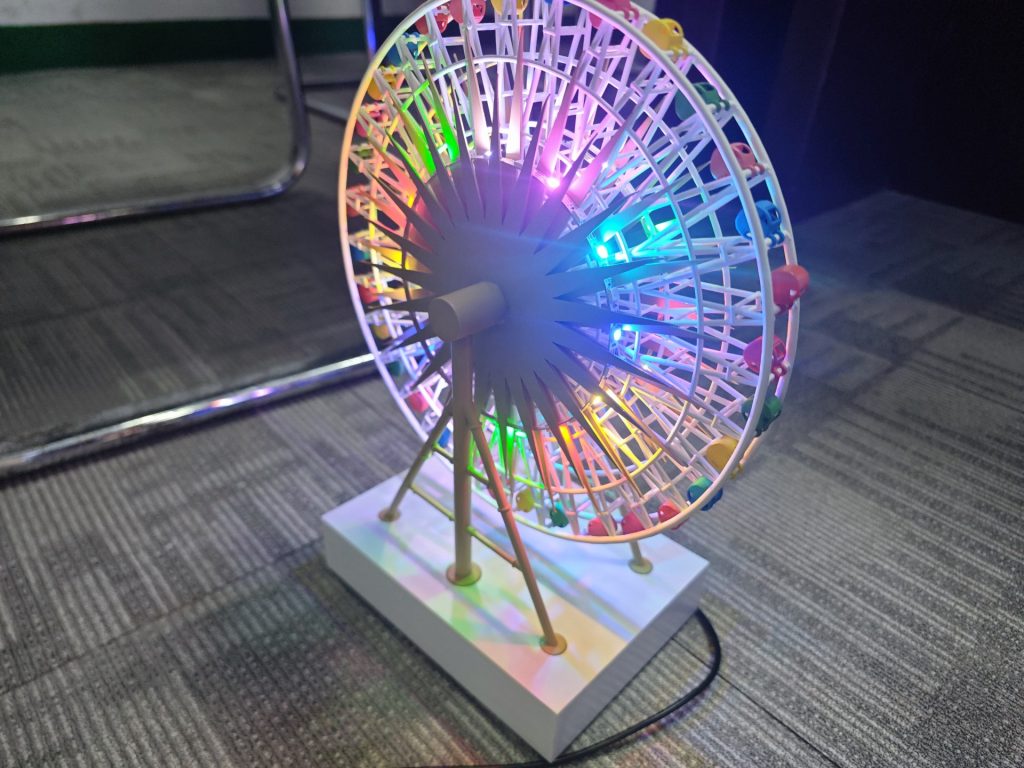
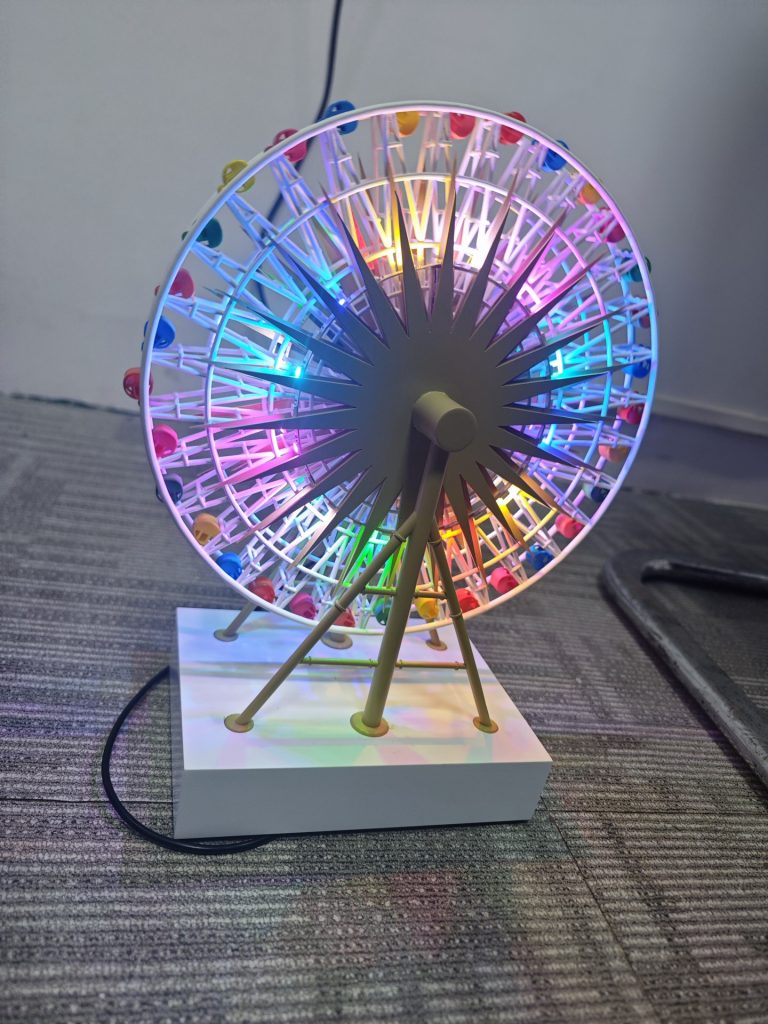
Miniature Ferris wheel model customization factory
1、 Material selection and preliminary preparation
Main structural materials
3mm thick ABS plastic board (wheel frame and bracket): excellent cutting performance, smooth surface for easy coloring, suitable for shaping the geometric skeleton of Ferris wheels;
Colored acrylic sheet (cabin): Use color palettes with good transparency such as red, yellow, blue, and green to simulate the colorful cabin effect in the picture;
0.8mm fine galvanized iron wire (spoke): It combines flexibility and support, and can be bent into a radial spoke structure;
White PVC board (base): hard texture and easy to cut, used as an overall support platform.
Lighting and Decorative Materials
3V RGB miniature LED strip (spoke lighting): can achieve multi-color gradient effect, fitting the neon light characteristics in the picture;
Button battery box (power module): compact in size, hidden inside the base;
Wooden round rod (central axis): The diameter matches the aperture of the wheel disc to ensure smooth rotation;
Transparent acrylic rod (cabin suspension rod): The thin diameter material does not block the light and enhances the suspension feeling.

2、 Main structure manufacturing process
Formation of roulette wheel skeleton
Wheel frame: Use ABS laser cutting to cut two concentric circles with the same diameter (the outer circle has evenly distributed cabin suspension holes), the inner circle diameter is about 1/3 of the outer circle, and the edge is reserved with spoke slots (one every 15 °, a total of 24).
Assembly of spokes: Cut galvanized iron wire into equal sections, bend both ends into an “L” shape and insert them into the inner and outer ring slots to form a radial spoke structure. Fix the interface with hot melt adhesive to ensure that the overall surface is flat and the spoke spacing is uniform.
Cockpit and bracket production
Cabin shaping: The colored acrylic sheet is cut into a droplet shape (5cm long, 3cm wide), and a transparent acrylic rod is drilled into the top. The top of the rod is bent into a hook shape and hung in the reserved hole on the outer ring of the wheel. According to the color distribution in the reference image, the red, yellow, blue, and green cabins are arranged at clockwise intervals.
Bracket processing: ABS board is cut into two symmetrical triangular brackets, and the bottom is fixed to a square PVC base (15cm × 15cm) with screws. The top is slotted and embedded with a wooden center shaft, and the two ends of the shaft are fitted into the center holes of the wheel disc to ensure that the wheel disc can rotate 360 °.
3、 Detail processing and surface coating
Wheel spokes and bracket treatment
Grinding of spokes: Use 400 grit sandpaper to smooth the surface of the galvanized iron wire spokes, remove the oxide layer, and spray white matte paint evenly without sagging, simulating the texture of the white spokes in the picture.
Bracket coloring: The triangular bracket is sprayed with white matte paint as a whole, which is consistent with the color tone of the spokes; The base is hand coated with white acrylic pigment, and after drying, lightly sanded with 800 grit sandpaper, and then sprayed with a layer of transparent varnish to enhance glossiness.
Cabin detail optimization
The edges of the cabin are finely polished with 1000 grit sandpaper to eliminate cutting marks and make the edges rounded; Paste silver reflective stickers internally to enhance the light reflection effect and improve transparency.
4、 Lighting system integration
Lamp strip arrangement
Stick RGB LED light strips along the inner side of the spokes, with a section (about 8cm long) arranged between every two spokes. The light strip interface is connected to the collector ring at the central axis through a thin wire to ensure that the circuit does not turn on when the wheel rotates.
The wire is hidden in the gap between the spoke and the central axis, fixed with hot melt adhesive to avoid entanglement during rotation.
Power Supply and Control
A button battery box and a simple switch are installed inside the base, and wires are threaded out of the bracket to connect to the collector ring. The switch is set on the side of the base, and when pressed, the light cycle switches between red, green, blue, yellow and other colors, simulating the colorful lighting effects in the picture.
5、 Overall assembly and calibration
Component splicing
Install the suspended cockpit wheel onto the central axis of the bracket, test the smoothness of rotation, and if it stalls, apply a small amount of lubricating oil at the contact between the shaft and the hole.
Check the stability of the cabin suspension to ensure there is no shaking or detachment during rotation. If necessary, reinforce the connection point between the hook and the wheel disc with hot melt adhesive.
Restoration verification
Adjust the spoke angle by comparing the pictures to ensure even radial distribution; The color arrangement of the cabin is consistent with the picture, and there are no dark areas when the lights are turned on.
The overall height and diameter ratio refer to the picture to ensure the coordinated dimensions of the wheel, bracket, and base, with a visual similarity of over 90% to the prototype.
6、 Finished product protection treatment
Spray transparent protective paint on the surface of the wheel and cabin to prevent scratches on acrylic sheets and fading of plastic parts;
Paste anti slip silicone pad at the bottom of the base to avoid sliding during placement.